When you have special requirements for the layout of the order list, you can use the plugins template system to create a custom template. To do this, you have to copy the template files to your (child) theme to prevent plugin updates from overwriting the changes you made. This article explains how to do that.
Copying the template files #
The first step in creating a custom order list template is to copy the files from the plugin to your child theme. If you do not have a child theme, you can also copy the files to your regular theme folder. However, since themes also get updated every once in a while, a child theme (which will never get updated automatically) is the safest place to put them.
Copy all the files from the plugin folder:
wp-content/plugins/woocommerce-order-list/templates/
to your (child) theme (replace ‘yourtheme’ by your theme folder):
wp-content/themes/yourtheme/woocommerce/order-list/
Many WooCommerce enabled themes will already have the /woocommerce folder – if not, you will need to create it. The /order-list folder is specific for this plugin, and you will always need to create this folder yourself. This is where the plugin will look for the look for the label template. After copying all the files from the plugin template to this folder, the structure will look something like this:
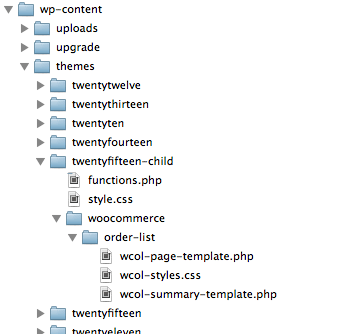
Now you are ready to start customizing your order list!
Customizing the template #
Now that you have copied the template files to your child theme, they are safe from plugin updates. Simply open the file wcol-page-template.php (or the accompanying stylesheet) in a text editor and start customizing!
Tip! Check the ‘Enable preview’ option in the settings, that way you can more easily debug the layout in your browser (view source or inspect element) while customizing.


