This guide will help you install & set up the WooCommerce Print Address Labels plugin.
Installing the plugin #
To install the plugin, you can follow our general guide: Installing WP Overnight plugins. Note that you get two download links in your order confirmation email, one for the WP Overnight Sidekick (our updater), which is not required for the plugin to work, but does give you automatic plugin updates, and another for the actual plugin!
Setting up the page layout #
You can find the page layout settings under WooCommerce > Address Labels > Page layout (tab)
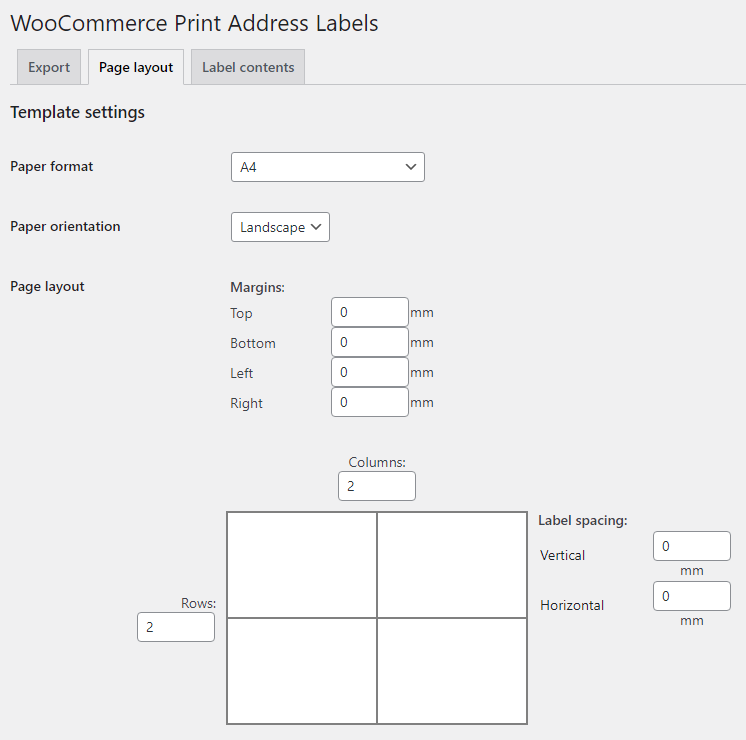
If you’re using the plugin to print on avery label sheets (multiple labels), this is where you set up how many rows/columns of labels your sheets have. If you’re printing single labels (on a label printer), you can set this to 1 column, 1 row.
Note: if you set the Top or Bottom margin to something bigger then 0, then Chrome may use this margin to print a header and footer (depending on if it is enough space for it in this margin). You can disable this in the print dialog.
Extra options #
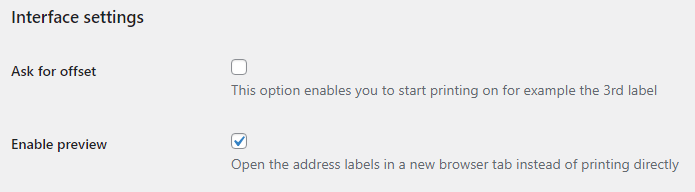
If you’re using label sheets and want to continue printing where you left off last time, you can enable the Ask for offset setting. This will give you a field where you can enter the number of labels to skip before printing.
The Enable preview setting is useful when you’re developing your own label template or want to test the custom styles you have entered in the Custom styles box.
Setting up the label contents #
Using placeholders #
By default, the WooCommerce Print Address labels plugin uses the address as formatted by WooCommerce, which is different for each country. You can override this behavior by building your own address format using placeholders.
Here’s a simple example:
[shipping_company]
[shipping_first_name] [shipping_last_name]
[shipping_address_1]
[shipping_address_2]
[shipping_postcode] [shipping_city]
[shipping_country]
In addition to these default address fields, you can also display custom fields from the order, like [VAT Number] if you are using WooCommerce EU VAT Numbers plugin. Simply put the custom field name between brackets, minus a leading underscore if it has one: so a custom field with the name _delivery_date would become [delivery_date].
The Remove empty lines option will make sure that no empty lines will be printed in the address if a certain field is not filled in (for example shipping_address_2).
Here’s a list of placeholders that you can use, excluding any custom fields:
| Billing fields | Shipping fields | Other data |
|---|---|---|
| [billing_address] | [shipping_address] | [order_total] |
| [billing_first_name] | [shipping_first_name] | [order_weight] |
| [billing_last_name] | [shipping_last_name] | [order_number] |
| [billing_company] | [shipping_company] | [order_date] |
| [billing_address_1] | [shipping_address_1] | [order_time] |
| [billing_address_2] | [shipping_address_2] | [order_items] |
| [billing_city] | [shipping_city] | [order_items_sku] |
| [billing_postcode] | [shipping_postcode] | [order_items_full] |
| [billing_country] | [shipping_country] | [shipping_method] |
| [billing_country_code] | [shipping_country_code] | [shipping_notes] |
| [billing_state] | [shipping_state] | [customer_note] |
| [billing_state_code] | [shipping_state_code] | [date] |
| [billing_email] | [total_qty] | |
| [billing_phone] | [sku_list] | |
| [qr_code] | ||
| [site_title] | ||
| [custom_field_name] | ||
| [wc_order_barcode] |
Using HTML #
With these placeholders, you not only have full control over the contents of the address, but you can also use HTML to format each element separately.
<span style="font-size:10pt">[order_number]</span>

<b>[shipping_company]</b>
<b>[shipping_first_name] [shipping_last_name]</b>
[shipping_address_1]
[shipping_address_2]
[shipping_postcode] [shipping_city]
[shipping_country]
You can even add images, using the HTML <img> tag, like a logo above the address:
<img src="http://www.yoursite.com/logo.png" style="width: 3cm;">
[shipping_address]
Printing the labels #
That was simple, wasn’t it? With everything configured, you can start printing the labels!
There are three ways to print labels:
- Via the bulk actions (for most shops, this will be the most convenient method)
- By status or date (for printing labels a large number of orders)
- Individually
Via the bulk actions #
On the top of the WooCommerce overview, there’s a dropdown menu with bulk actions, which has a link to print the address labels:
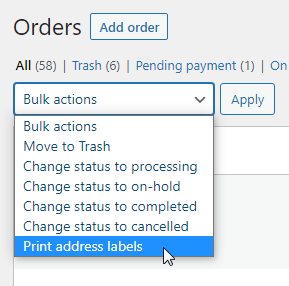
Simply select the orders (checkbox in front of the order), then Print address labels and click Apply.
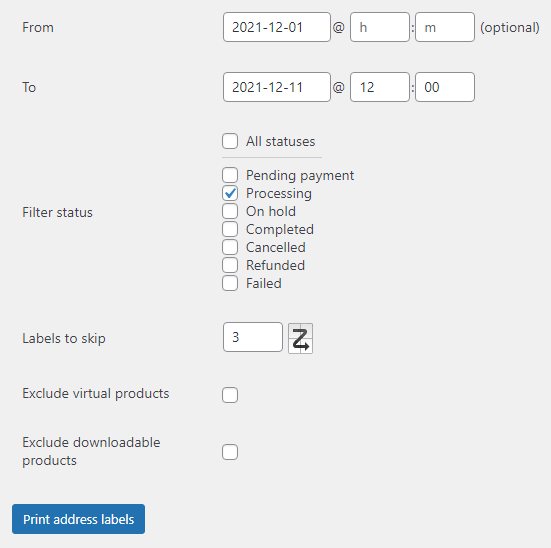
By status or date #
You probably noticed this screen when you went to the settings page, it’s the Export tab under WooCommerce > Address Labels
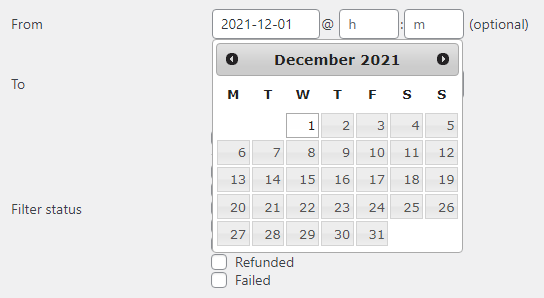
You can enter a date range here, although that’s optional if you’re only concerned with the order status.
If you have enabled the Ask for offset feature in the interface settings, you can also enter that here.
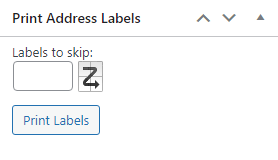
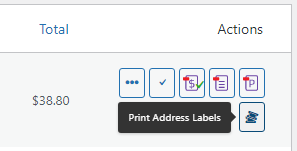
Individual labels #
If you only want to print individual labels, you can either do this from the order overview:
Or in the right column of the edit order page (if you want, you can drag this block higher up in the column and WordPress will remember this position):