Installing any of our plugins is relatively straightforward, but if you have never manually installed a plugin before, it may be a bit daunting. Here’s a simple, step by step guide.
Installing the plugin #
Via the WordPress backend (recommended) #
- Download the plugin zip files from your order confirmation email
- Note: Some browsers (like Safari, depending on the settings) automatically unpack the zip file when downloading, try to make sure that you get the zip file and not the contents of that zip, as you can only upload it as a whole when installing the plugin via the WordPress backend. If you’re installing the plugin via FTP, you do need to extract the zip.
Instructions for disabling automatic opening in Safari can be found here: Disable “Open Safe Files After Downloading” Feature in Safari
- Note: Some browsers (like Safari, depending on the settings) automatically unpack the zip file when downloading, try to make sure that you get the zip file and not the contents of that zip, as you can only upload it as a whole when installing the plugin via the WordPress backend. If you’re installing the plugin via FTP, you do need to extract the zip.
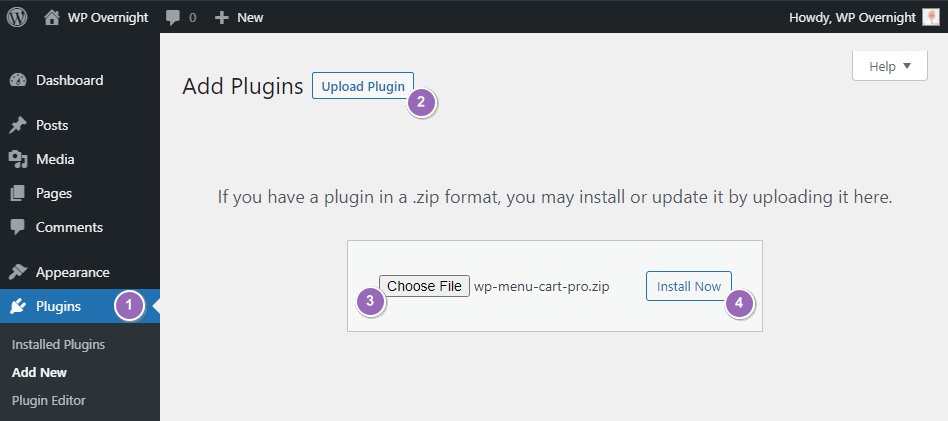
- On WordPress, go to:
- Plugins > Add New
- Then click the Upload Plugin button on the top of the page
- Browse to the zip file you downloaded previously
- Then press Install Now.
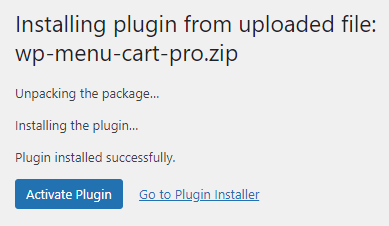
- After the upload/installation is finished, press the Activate Plugin link, and you’re done!
Via FTP #
- Unzip the plugin zip file, you should see a single folder named after the plugin.
- Connect to your WordPress server with your SFTP client.
- Copy the plugin folder to the
wp-content/pluginsfolder in your WordPress directory. This installs the plugin to your WordPress site. - Navigate to your Plugins admin screen and locate the newly uploaded plugin in the list.
- Click the plugin’s Activate link.
Activating your license #
If you want to receive automatic update notifications for your plugins, you need to activate your licenses, either by using the built-in updater from the plugin list (recommended) or by using the legacy WP Overnight Sidekick plugin.
Via the built-in updater (recommended) #
All plugins come with a built-in updater, which is the easiest way to manage your license if you’re installing just a single plugin. If you have already installed the WP Overnight Sidekick, please skip to the next section. Here’s how you can activate your license with the built-in updater:
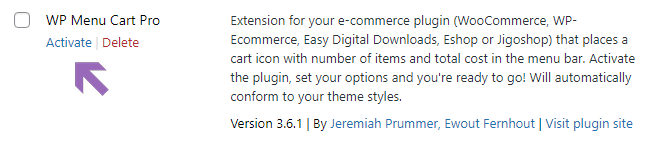
- Go to Dashboard > Plugins > Installed Plugins
- Find the plugin to activate in the list (in the example below is WP Menu Cart Pro): you should see a yellow notice with an input field in which you need to enter your license key.
- Click on the Activate button. If the license is valid, you should see the remaining time up to the license expiration, and the count of your activated sites.
- That’s all! From now on, you will receive notifications every time we launch new releases, and you will be able to update with just one click!
Via the WP Overnight Sidekick plugin #
Although our plugins already come with a built-in updater, our legacy WP Overnight Sidekick plugin is still compatible and supported, so if you prefer to continue using this plugin, follow the steps below to find out how to activate your licenses:
- If you have installed our legacy WP Overnight Sidekick plugin, go to WP Overnight > Manage Licenses
- Enter the license key(s) for the plugin(s) that you have purchased, you can find them in the order confirmation email
- Save the license keys and press the activate button for each license to activate the license.
- That’s all! From now on, you will receive notifications every time we launch new releases, and you will be able to update with just one click!


