With WooCommerce Smart Reminder Emails its super simple to let WooCommerce send emails on a schedule, like WooCommerce payment reminders or asking your customers to post a review on your site. In this tutorial, we’ll set up a payment reminder that is sent 5 days after the order has been placed.
Creating the email #
First, we’re going to create the email. Go to WooCommerce > Reminder Emails, and click on Create your first email!

The first thing to do is to set up the title, subject, heading and optionally extra recipients (CC & BCC). Note that you can use the placeholders listed in the sidebar for both the Subject and the Heading field!
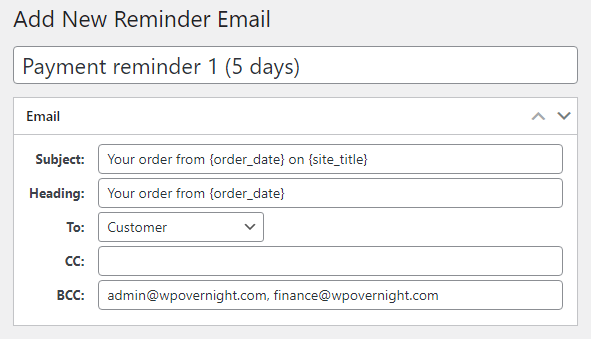
- Title – this is the name that will be used internally in the WordPress admin only, in your list of emails, on the scheduled emails list and when configuring PDF invoice attachments.
- Heading – this is the heading that will appear at the top of the email body text. This is optional but recommended for consistency (all default WooCommerce emails also use this format).
- To – This is where the plugin will send the email. By default, this will be addressed to the customer, using the email address they entered when placing the order. You can also specify a specific email address by setting this to “Other (specify below)”.
- CC – If you always want to receive a copy of the reminder email on a certain address, you can enter one or more email addresses here, separated by commas (“one@email.com, another@email.com”).
- BCC – Same as CC, except that the customer will not see your email address. We recommend to use BCC rather than CC for most purposes.
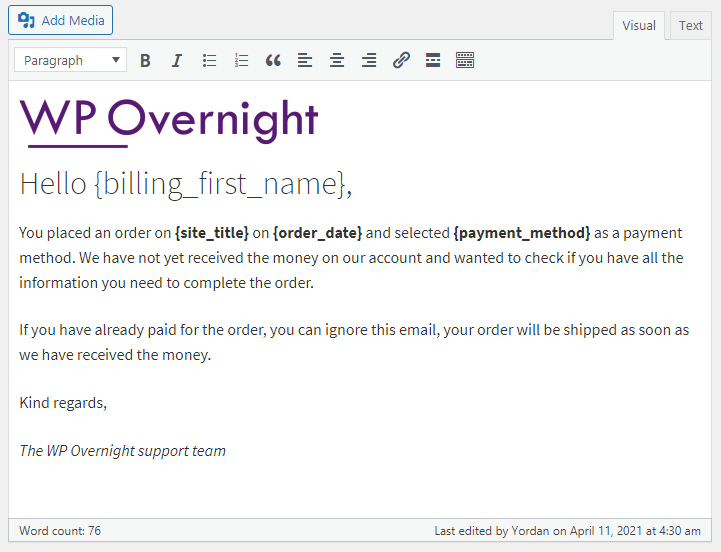
Now that you have set up the title, header and recipient, you can enter the email text. Here too, you can use the placeholders listed in the sidebar to put information from the order into the email, they will be automatically replaced when the email is sent. We advise you to use media and specific formatting sparsely. Several email clients remove extra formatting or only support a limited set of CSS properties.
Configuring the email trigger #
We want this email to be sent 5 days after the order has been placed. Most non-direct payment gateways (including the default Direct Bank Transfer (bacs), Cash on Delivery and Cheque gateways bundled with WooCommerce) set the order to the ‘On Hold status when it is first placed. So we’re using this status plus the payment method for our WooCommerce reminder email.
Available triggers:
- When to send – Allows to select the amount of time after a certain status is triggered.
- After sending email, change status to – Set a different order status or select the same status.
- Unschedule existing emails if:
- A customer places a new order
- A customer places a new order for the same products
- Payment method
- Order status
- Shipping method
- Products
- Orders must contain:
- All of these products
- One or more of these products
- Orders must contain:
- Exclude products
- Product categories
- Order must contain:
- All of these categories
- One or more of these categories
- Order must contain:
- Exclude categories
- Order total price – Set a certain amount, then set one of the conditions below:
- More than
- More than or equal to
- Less than
- Less than or equal to
- Equal to

Creating multiple triggers #
Required #
Version 2.8.0 – WooCommerce Smart Reminder Emails.
Example setup #
In our example scenario, payment reminders will help describe a use-case for this feature:
- A payment reminder is sent to customers that have chosen direct bank transfer (BACS) as the payment method.
- The 1st reminder is to be sent after 30 days, if the order status is ‘On hold‘.
- The 2nd reminder is to be sent after 60 days, if the order status is ‘On hold‘.
In WooCommerce, ‘On hold‘ is the default order status after an order is placed with the BACS payment method.

If the customer pays for their order:
- after the 1st email reminder,
- but before the 2nd reminder…
…the 2nd reminder will simply not be sent.
Important note: If a backend user forgets to also add the ‘On hold’ status in the ‘Additional order requirements‘ section, customers that already paid their order will still receive a reminder.
Testing #
After you have created the email and configured your trigger, it’s a good idea to test the workflow.
We don’t want to wait 5 days for this test, so instead we are going to set this to 5 minutes for now.
- Place an order via the checkout, just like the client would normally do, using your non-direct payment method (Direct Bank Transfer in our case).
- Verify that the order is correctly received and set its status to On Hold in the WooCommerce order admin
- The email should now be listed in the Scheduled Emails list (WooCommerce > Reminder Emails > Scheduled Emails tab).
- Wait until the scheduled time has passed and make sure to visit a page on your site, this can be any page (frontend or backend) and will make sure a WP Cron event will be triggered.
- Verify that the email is sent. Congratulations! You have successfully setup automatic WooCommerce payment reminders
- Don’t forget to set the trigger back to ‘Days’ to prevent your customers from receiving this email after 5 minutes, too!
Did the email not get sent? Here’s a few steps to troubleshoot what went wrong:
- It could be that you checked a bit too early and the WordPress cron was not triggered yet. Browse your site some more and check the Scheduled emails tab again.
- If the email is still not sent, try manually sending it by pressing the ‘play’ icon in the scheduled emails list.
- If it is still not being sent, there is something wrong in the email configuration. Contact us at support@wpovernight.com, and we’ll do our best to find and fix the root cause.
Viewing scheduled emails #
To keep track of all scheduled emails and to cancel them or send them before the scheduled time has passed, all emails are listed in WooCommerce > Reminder Emails > Scheduled emails:

This page has four columns:
- Order # – The WooCommerce order number for which the email has been scheduled
- Email – The internal name (title) of the email
- Trigger title – The title give to the email trigger settings
- Trigger # – The ID number of the email trigger
- Scheduled date – when this email will be sent
- Actions – Immediately send the email (play) or cancel the email (cross)
Manually schedule emails #
Path: WooCommerce > Reminder Emails > Manual schedule.
This section allows for using the following options:
- Emails: Select the created reminder emails that will be sent.
- Orders from: The beginning date of the date range of orders to include.
- Orders to: The ending date of the date range of orders to include.
- Filter users: Select which users will receive a reminder email. Leave blank to send to all relevant users.
- Skip if already scheduled: Activate this if there is a desire to skip already scheduled emails. These can be observed in the ‘Scheduled emails‘ tab.


