Caution #
The changes as described in this document cannot be undone!
Please proceed with care.
Activate setting #
Path: WooCommerce > PDF Invoices > Advanced > Settings, then scroll down to Enable danger zone tools.


Next, head to: WooCommerce > PDF Invoices > Advanced > Tools, then scroll down to find the following new options revealed:
- Renumber existing documents

- Delete existing documents

Both of these options allow for selecting:
- Document type (Invoice, Receipt, all, etc)
- Date type:
- order created date
- order modified date
- order completed date
- order paid date
- Date range (to and from)
The ‘Renumber existing documents‘ settings also allow for selecting ‘document date‘ as a date type.
Reset number sequence #
After deleting existing document numbers, it is important to select where the document number sequence should restart.
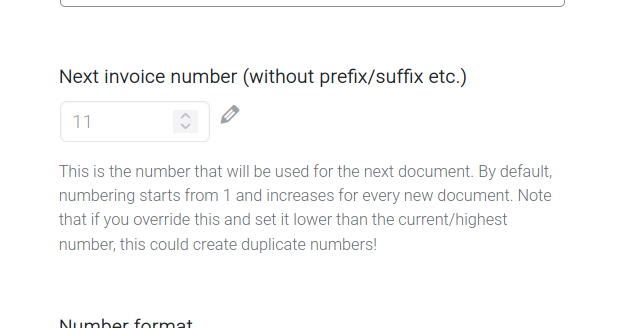
- Path: WooCommerce > PDF Invoices > Document, select the document type, then scroll down to Document details > Next {document} number (without prefix/suffix etc.).
- NOTE: {document} = any document type (Invoice, Receipt, etc).
Click on the pencil icon on the right side of the textbox, to edit the number.
Modify per order #
This can be done at the WooCommerce order details screen, at WooCommerce > Orders, then selecting an order.
Once in this screen, find the ‘PDF document data‘ block and this should contain PDF document data, along with pencil and trash icons. These correspond to modifying or deleting the document number.

After clicking the pencil icon to edit the document data, a notice mentioning locked options will appear:
“Editing of invoice number and date is currently disabled. If you need to enable this feature, you can do so in the Advanced settings section under Enable document data editing.”
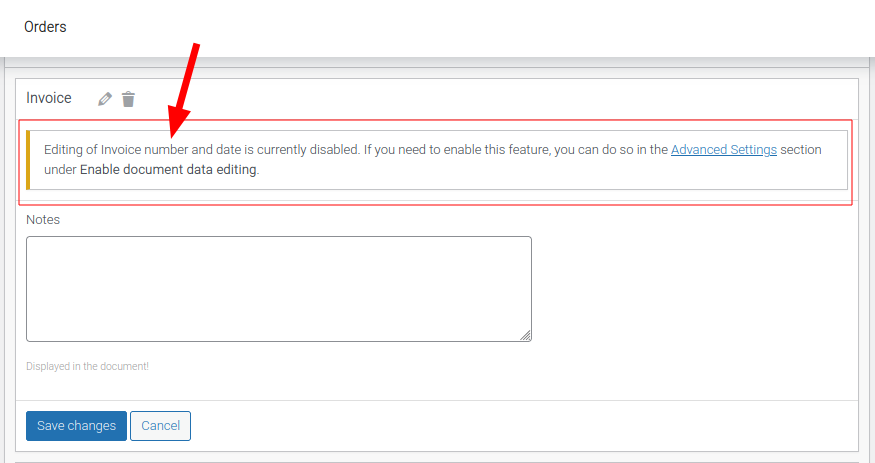
This is because the document data editing setting needs to be enabled. The setting is disabled by default as document editing is prohibited in certain countries. To comply with that, we have decided to disable the option by default.
Enable the document data editing option at WooCommerce > PDF Invoices > Advanced > Settings > Enable document data editing.
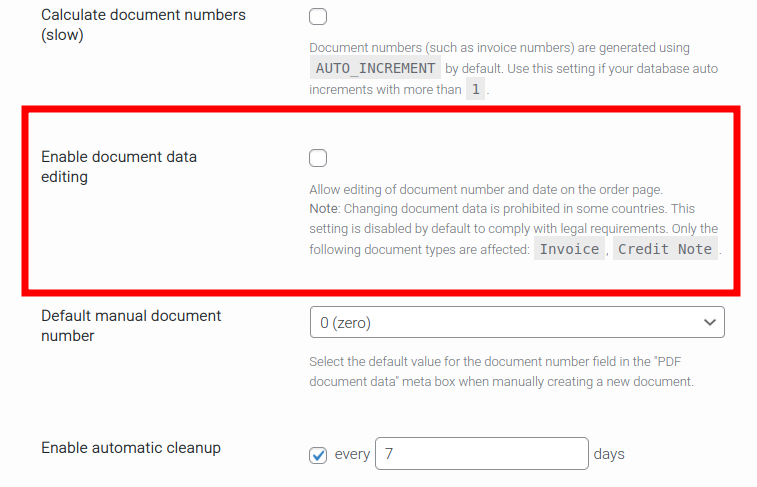
After enabling the option above, the documents can now be edited back at the order backend screen.
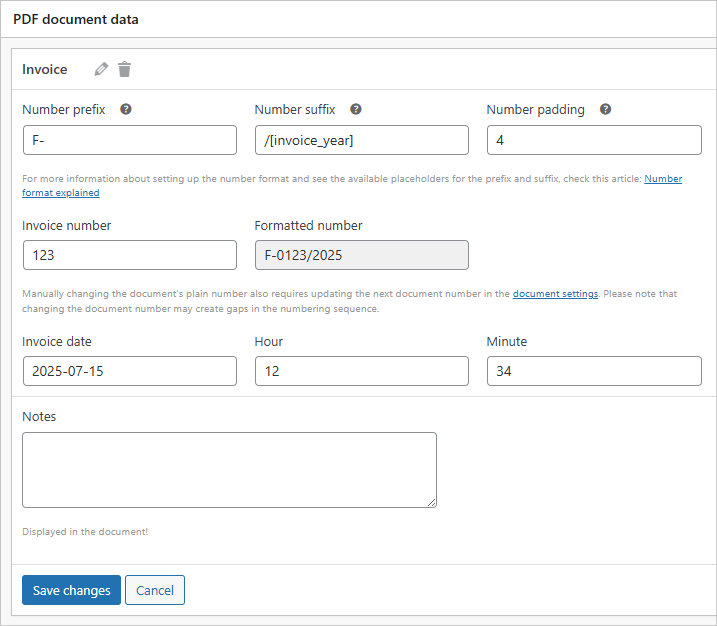
The following document data can be edited:
- Number prefix
- Number suffix
- Number padding
- Document number
- Document date
- Document hour
- Document minute
A preview of the generated document number can be seen under the locked “Formatted number” input textbox.
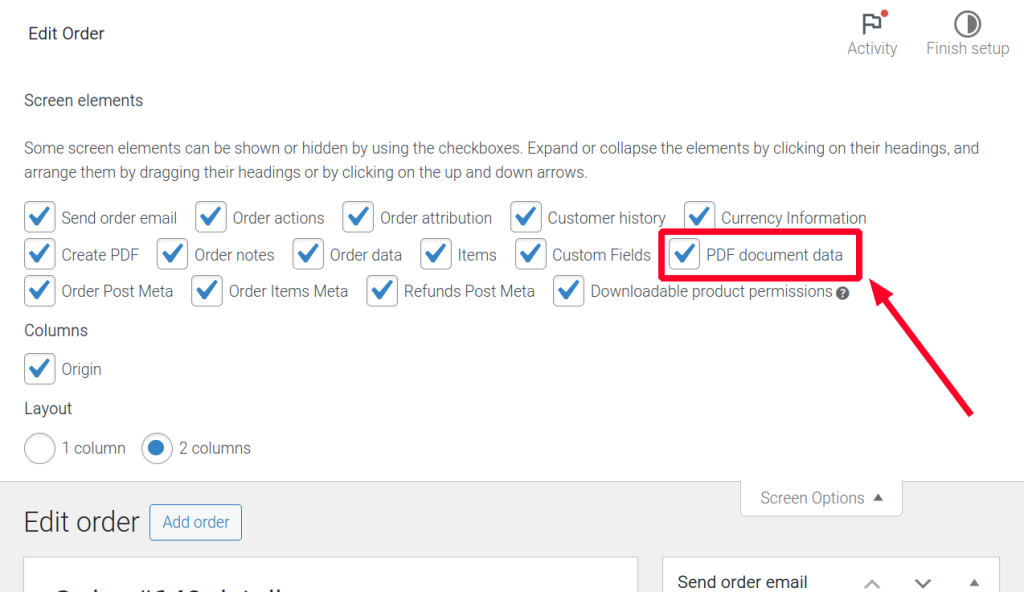
If you are unable to find this ‘PDF document data‘ section/block, please scroll all the way up to the top-right of the page and click the ‘Screen Options‘ button.

Once the options are revealed, make sure that ‘PDF document data‘ is selected.
