It is important to note that there is a difference between a WordPress User and a Customer from our plugin. These are not exactly the same, as our plugin is based on WooCommerce data, not WordPress user data. Note that Customers created & managed by our plugin only appear in Customers > Customers.
Our plugin is capable of using WordPress user data in order to create Customer data.
Create a customer manually #
Path: Customers > Customers > Add customer.
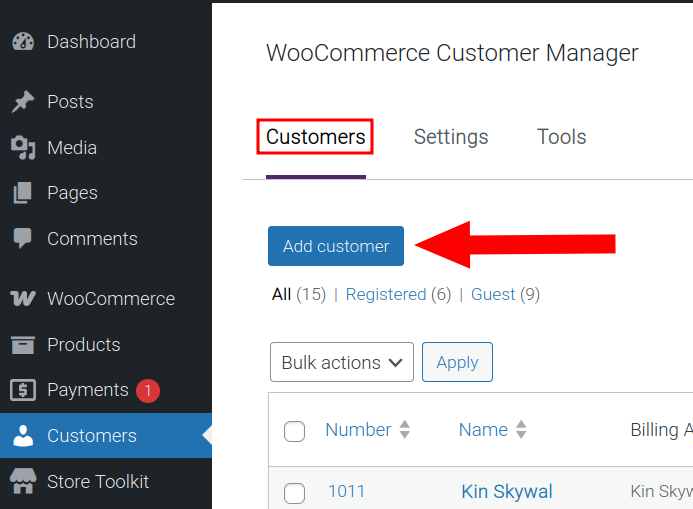
With a click of the button:
- The new WooCommerce customer data can be filled-in, to create a customer.
- An already existing WordPress user can be searched, in order to create a customer. This uses the 1st field, ‘Locate existing user‘.

Import from CSV file #
Path: Customers > Tools > Import your CSV file.
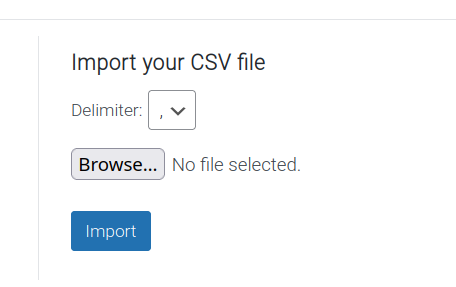
A delimiter (separator) can be chosen. For more, a code snippet must be used, which we can help with (email support@wpovernight.com).
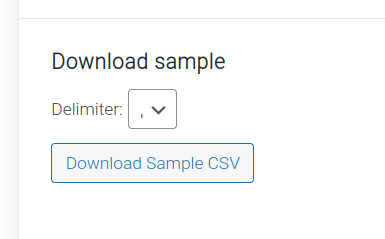
A sample file can be downloaded at Customers > Tools > Download sample.
When the import process reads the CSV file’s rows, new customer data will be imported if the row has a matching:
- name,
- email,
- number,
…otherwise the import process will skip to the next line. If those mentioned fields do not match, a new user will be created in the Customer Manager settings.
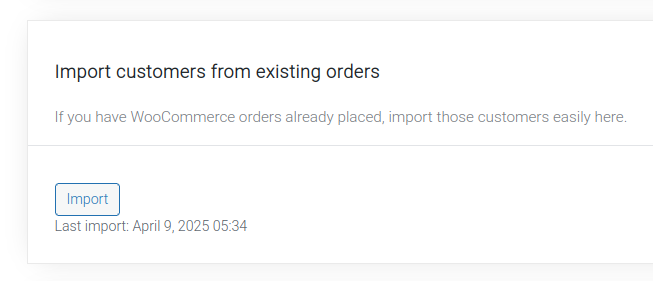
Import customers from existing WooCommerce orders #
Path: Customers > Tools > Import customer rom existing orders.
The customer data can only be imported. If there is a matching name, email and number, the import will skip to the next import. If those do not match, a new user will be created in the Customer Manager settings.
Schedule WooCommerce data import #
- This triggers the Import customers from existing orders setting.
- This requires a code snippet to .
- The code snippet will make the Import customers from existing orders setting get triggered repeatedly for a given amount of time, until the code snippet is deactivated.
After applying the code snippet to your site, there is nothing else that needs to be done. Triggering the provided setting manually will still function as intended.
function wccm_schedule_customer_import_from_orders(): void {
    if ( ! class_exists( 'ActionScheduler' ) ) {
       return;
    }

    $frequency_in_seconds = 60;

    if ( ! as_next_scheduled_action( 'wccm_run_customer_import_from_orders' ) ) {
       as_schedule_recurring_action(
          time(),
          $frequency_in_seconds,
          'wccm_run_customer_import_from_orders'
       );
    }
}

add_action( 'init', 'wccm_schedule_customer_import_from_orders' );

function wccm_run_import_background_process(): void {
    if ( ! function_exists( 'WPO_WCCM' ) ) {
       return;
    }

    WPO_WCCM()->background_import->push_to_queue( [
       'limit'  => 5,
       'offset' => 0,
    ] );

    WPO_WCCM()->background_import->save()->dispatch();
}

add_action( 'wccm_run_customer_import_from_orders', 'wccm_run_import_background_process' );
Notes:
- One modification needs to be done. On line 6 of the code snippet, the time is set to 60 seconds. Set this to the time in the unit of seconds.
$frequency_in_seconds = 60;
- 1 week = 604800 seconds.
- If you haven’t worked with code snippets (actions/filters) or functions.php before, read this guide: How to use code snippets.
- We also have a blog post here that you may find helpful about adding custom code to your site.


