Minimum version #
WooCommere Ultimate Barcodes v2.1.0
Enable feature #
Path: WooCommerce > Barcodes > Orders > Order picking
Full order picking settings #
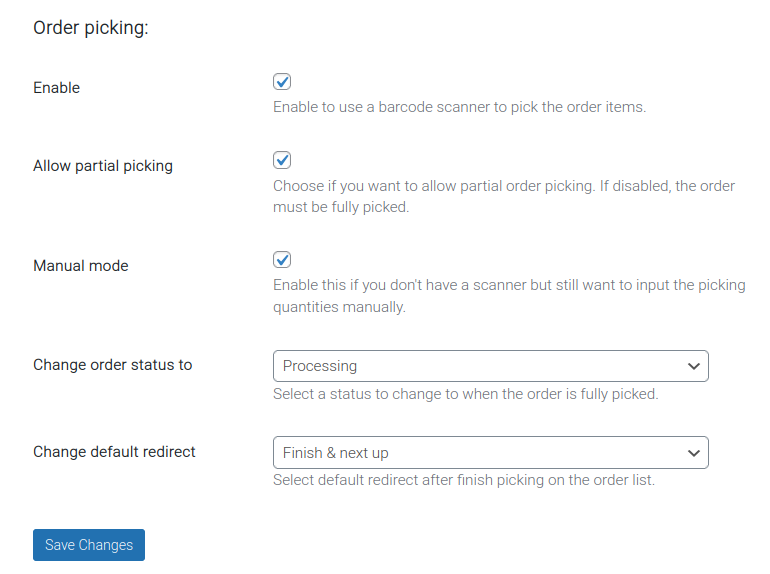
Enable #
Enable to use a barcode scanner to pick the order items.
Allow partial picking #
Choose if you want to allow partial order picking. If disabled, the order must be fully picked.
Manual mode #
Enable this if you don’t have a scanner but still want to input the picking quantities manually.
Change order status to #
Select a status to change to when the order is fully picked.
Available options by default:
- None
- Pending payment
- Processing
- On hold
- Completed
- Cancelled
- Refunded
- Failed
- Draft
Change default redirect #
Available options:
- Finish & next up
- Finish & next down
- Finish & close
Trigger order picking #
This can be done from 2 locations.
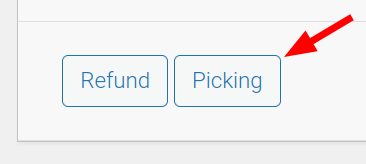
`1. From the WooCommerce order action buttons.
Path: WooCommerce > Orders.
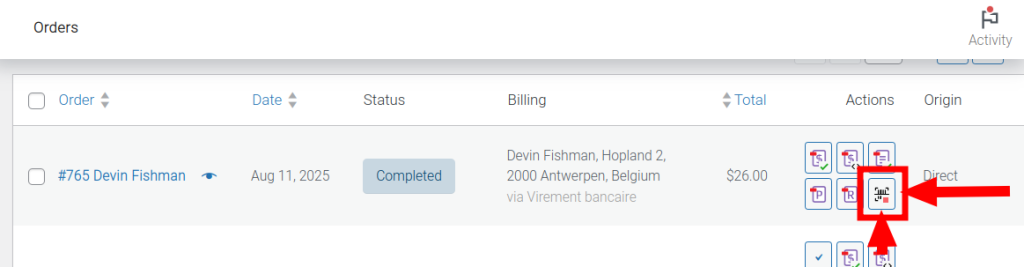
Zoomed-in icon:

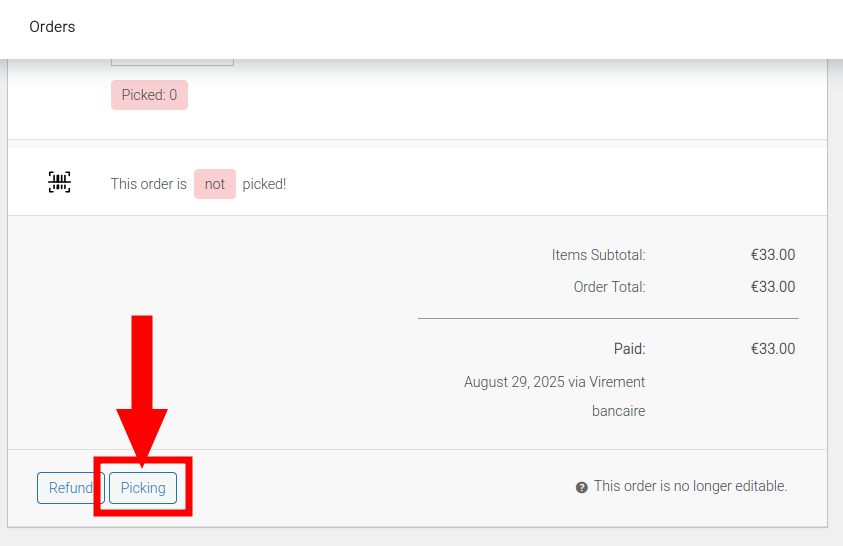
- From WooCommerce order details screen.
Path: WooCommerce > Orders, then select an order. Check the order-editing buttons below the order totals section.
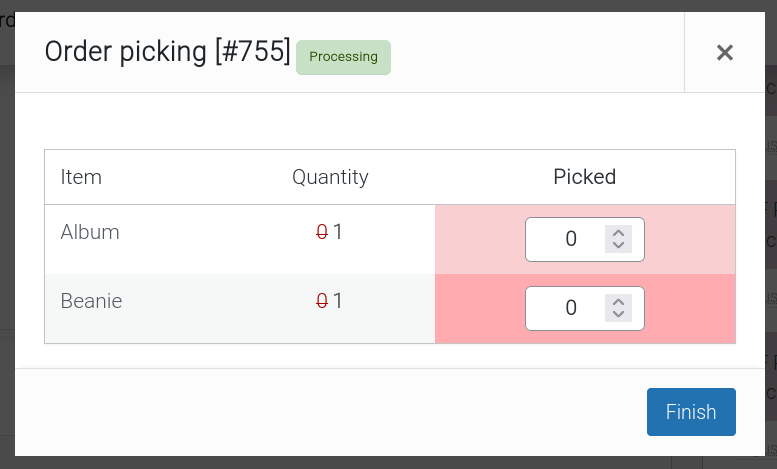
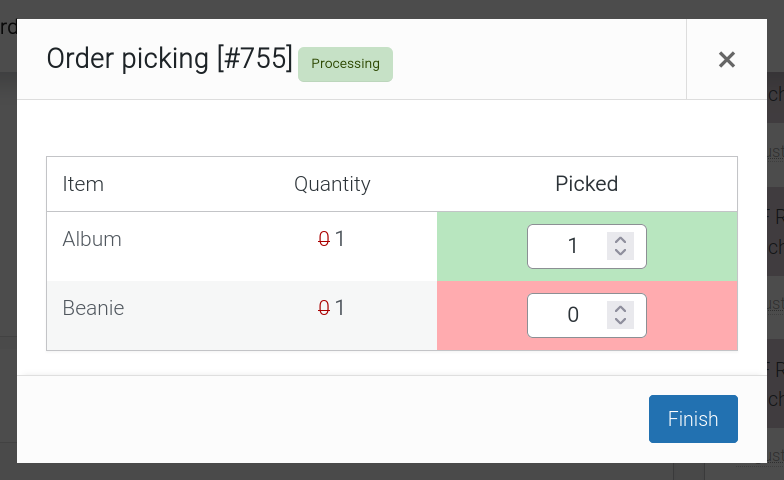
Order picking process #
When one of the trigger buttons above is clicked, a modal window appears, showing all the order contains that can be picked. The scanner can then be picked to start scanning barcodes to pick the order items.
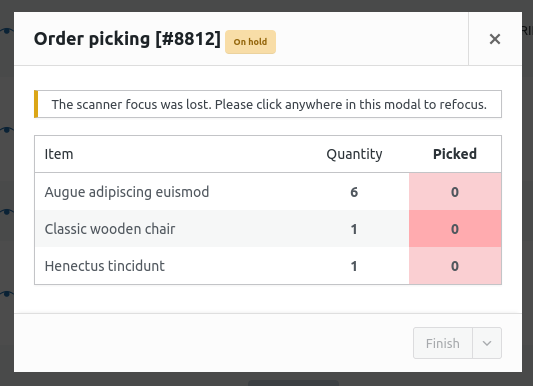
Also from this modal, order items to be picked can be manually managed without a scanner, if the manual mode setting is enabled.
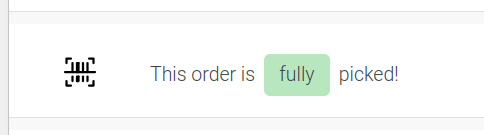
The picking status of each order item can be observed in the WooCommerce order details screen.
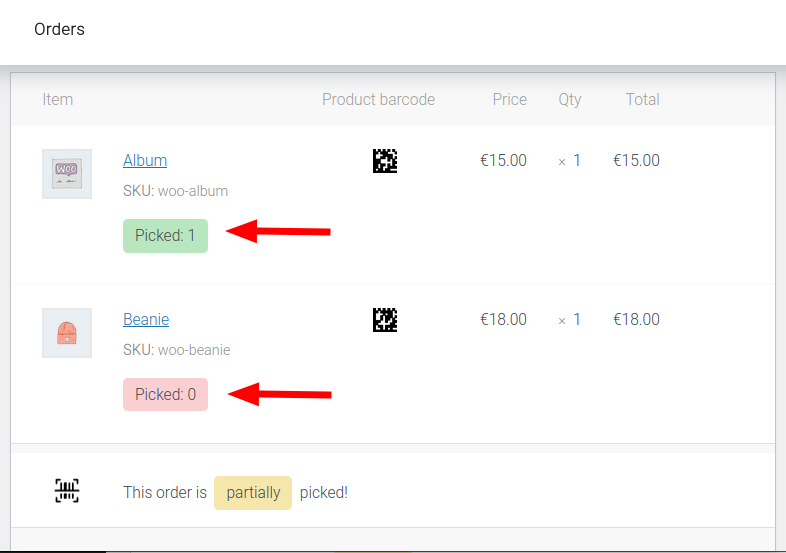
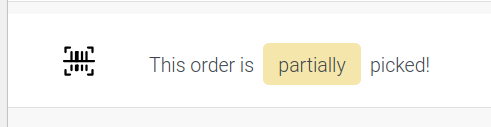
After the picking process, the order is marked as partially picked (see allow partial picking setting) or fully picked, still in the WooCommerce order details screen, below the order items.
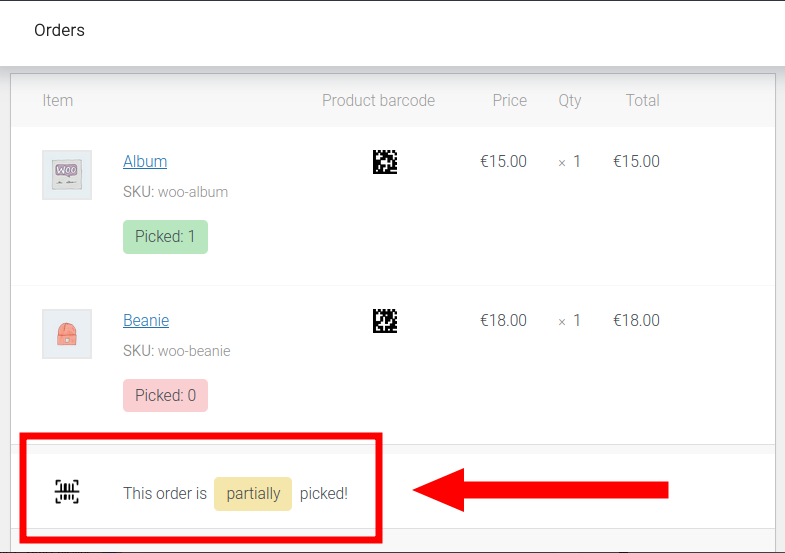
- Partially picked:
- Fully picked: