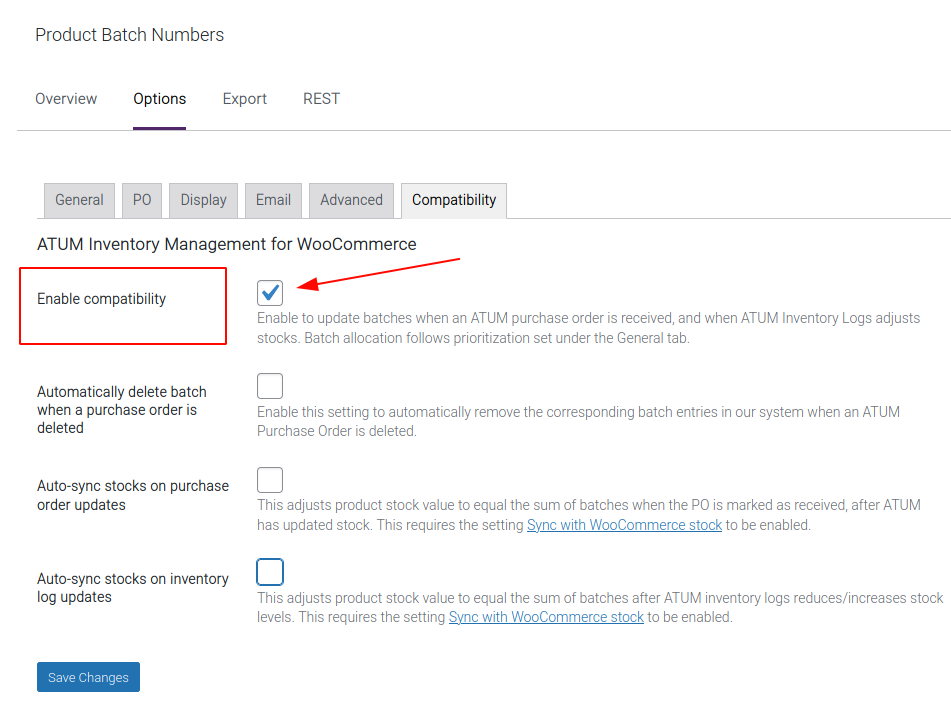
Enable required settings #
Path: Products > Batch Numbers > Options > Compatibility > Enable compatibility.
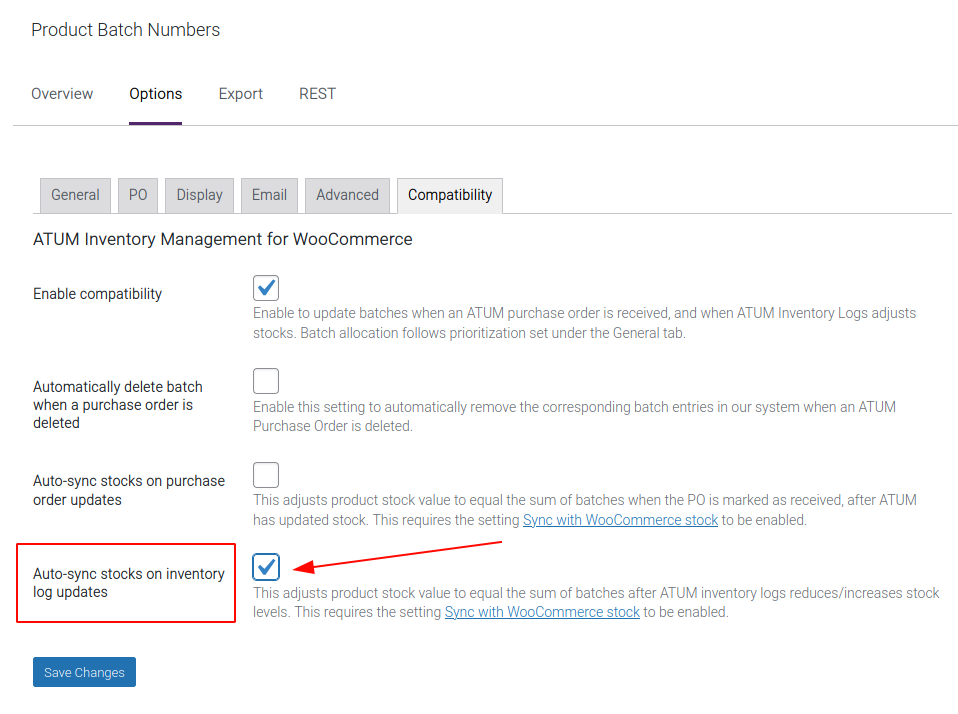
Then, enable another option right below.
Path: Products > Batch Numbers > Options > Compatibility > Auto-sync stocks on inventory log updates.
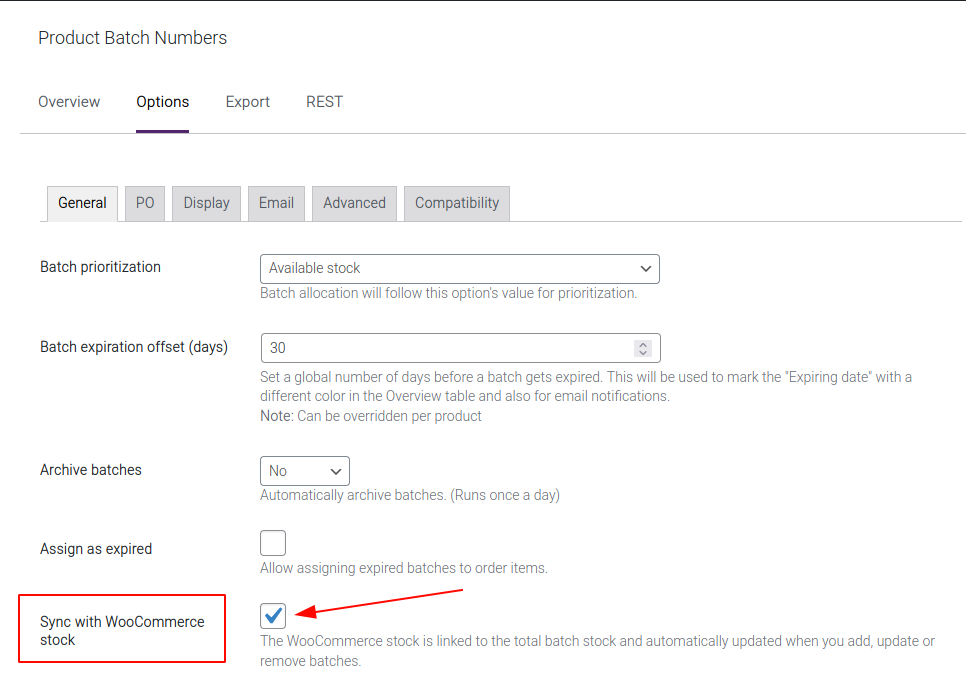
Next, head to the General sub-tab to activate the next setting.
Path: Products > Batch Numbers > Options > General > Sync with WooCommerce Stock.
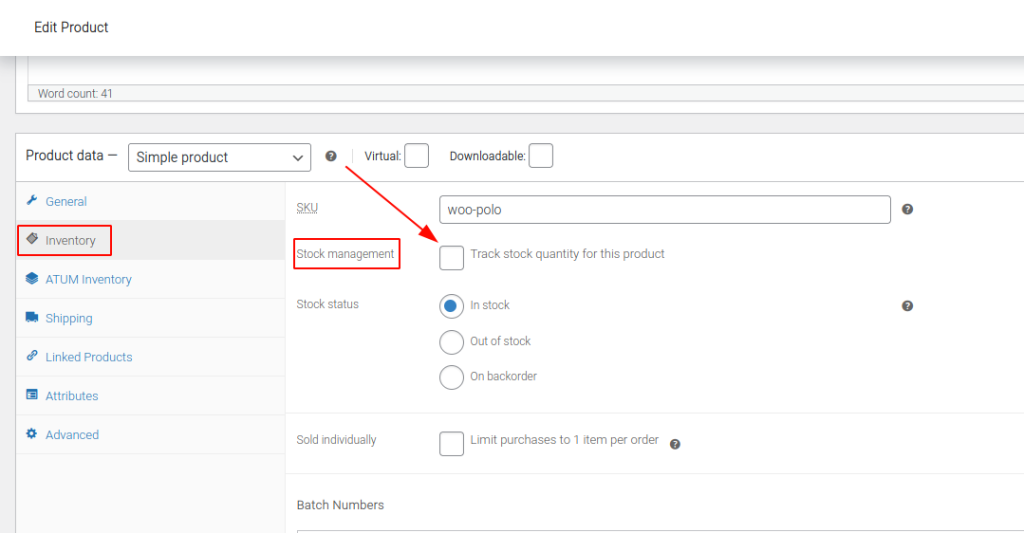
Finally, only Products with ‘Stock management‘ enabled via the WooCommerce Products settings will be compatible. To activate this per product, go to Products, then select a Product. This will lead to the ‘Edit Product‘ page.
Scroll, down to the ‘Product data‘ section, select the Inventory sub-tab and enable the ‘Managing stock‘ option. Remember to save!
Stock compatibility #
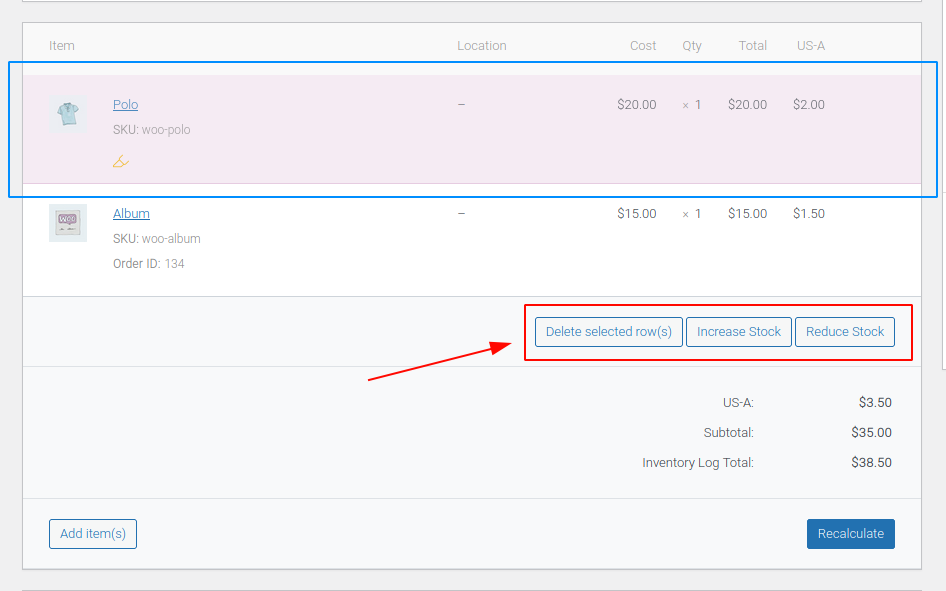
Now, head to ATUM > Inventory Logs and select a log. This will lead to a focus view of the log. Scroll down to the Products in the log and select at least one product in order to reveal the ATUM stock-changing options.
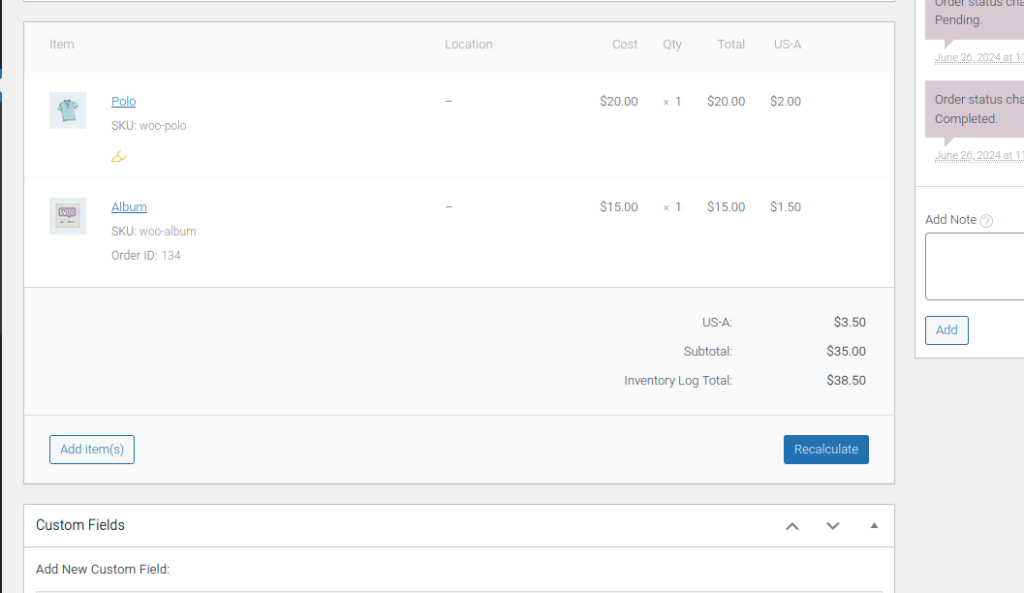
The clicked item will appear highlighted and some new options will now be revealed.
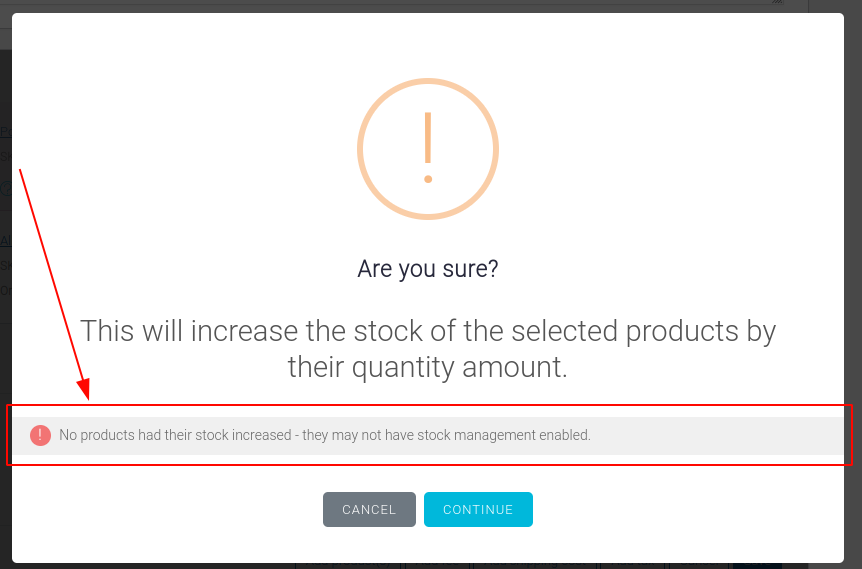
If you encounter errors – like in the image below – while trying to change the stock, make sure you refer back to the required activated settings.
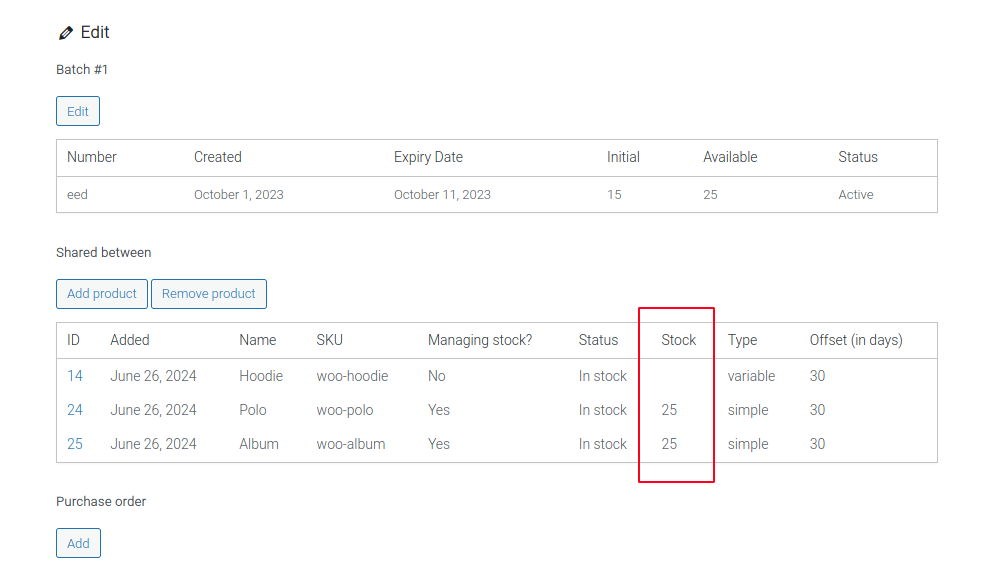
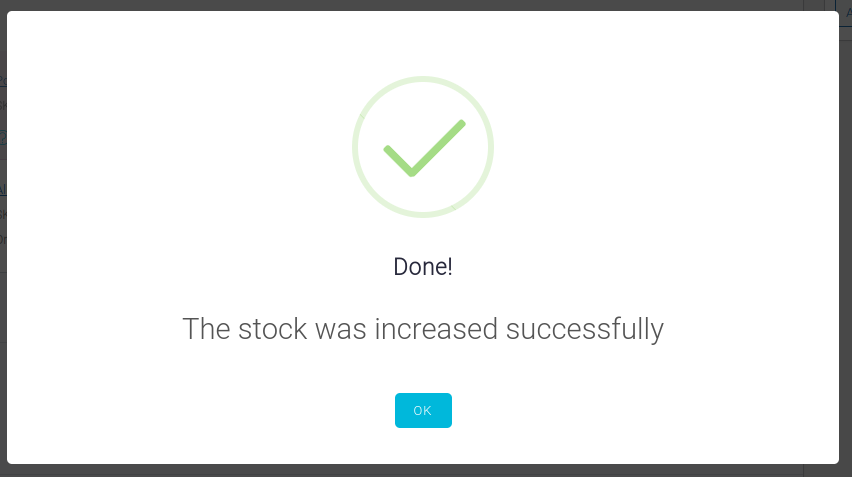
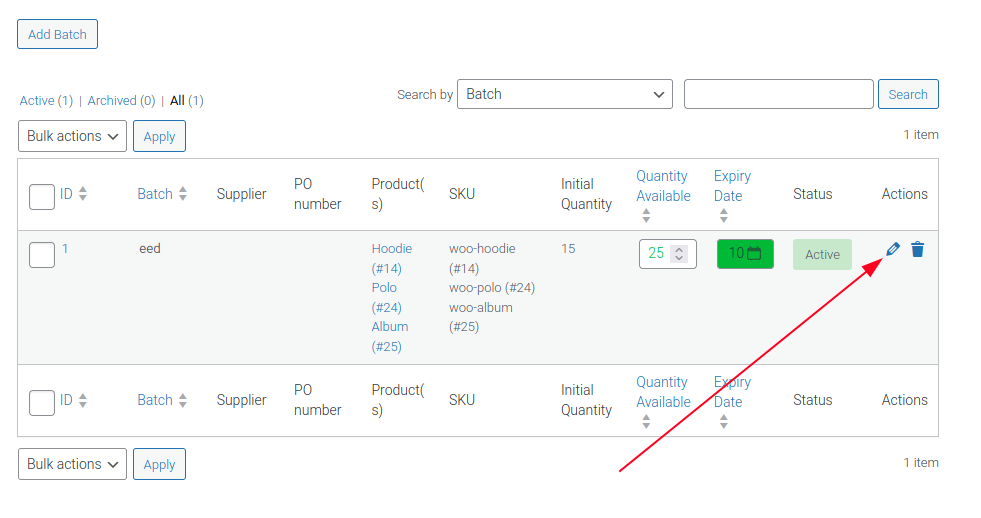
Increasing or reducing the Stock here will reflect into our Product Batch Numbers plugin. This can be observed at Products > Batch Numbers > Overview, then select the pencil icon on the right, on any of the Batch entries.
The first table, showing the Batch number, will show the modified Batch stock count under the ‘Available‘ table-header.
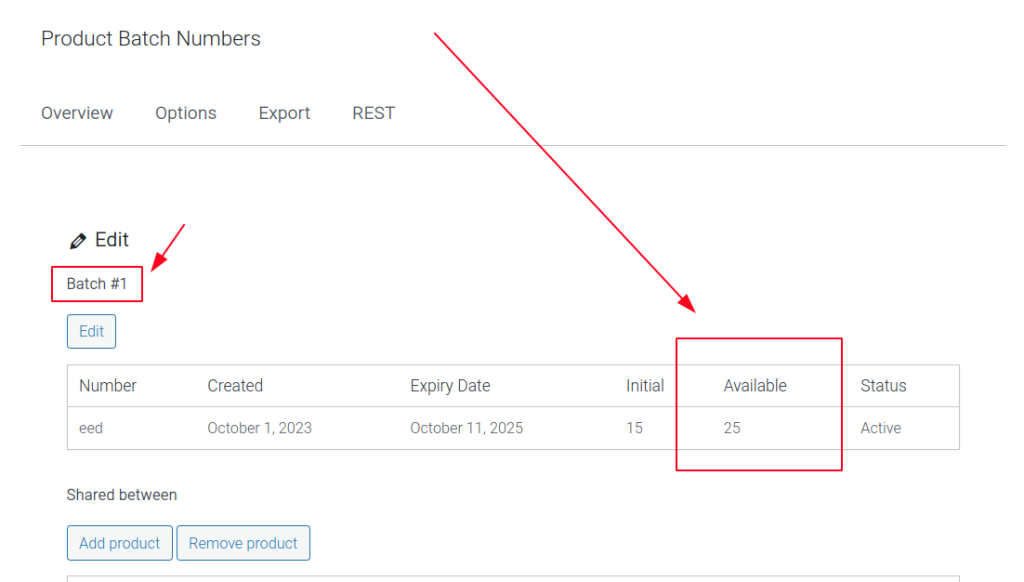
You can also scroll down to the ‘Shared between‘ table in order to observe the stock of the items contained in the modified ATUM Inventory Logs.